


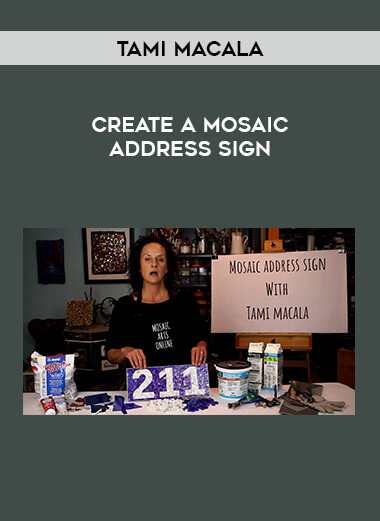
Create a Mosaic Address Sign with Tami Macala
 Salepage : Create a Mosaic Address Sign with Tami Macala
Arichive : Create a Mosaic Address Sign with Tami Macala
Have you been searching for the perfect address sign for your home, or wanted to give something unique for a housewarming gift? Now is your chance to create a beautiful mosaic address sign using Mexican Smalti tile.
Join Tami Macala, owner of Mosaic Arts Online, as she leads you step-by-step in creating your very own address sign.
In this online course Tami creates an address sign using Mexican Smalti tile. She also introduces viewers to the many other possible materials that can also be used to create this project.
Tami starts by introducing a variety of substrates that can be used for creating your address sign. She will execute the mosaic in this course using the “EZ Mosaic Frame” technique from Wits End Mosaic, but there are endless options.
From here, Tami leads you through the different design and template choices, and then describes a variety of tesserae (materials). She will then share the best adhesives for this exterior grade mosaic.
Tami goes into great detail demonstrating the different cutting techniques for each of the materials she introduces. This gives students a comprehensive lesson for creating this project with other materials. These can then be used on other projects in the future.
Once your materials are chosen, Tami takes you on an in-depth journey creating a Mexican Smalti address sign. She spends a great deal of time cutting and adhering tiles. Students will listen to music while they observe Tami working in front of the camera.
When the mosaic is complete and it is time to grout, Tami introduces you to epoxy grout. Tami will show you how to get more “pop” from your numbers by choosing certain grout colors and using a double color technique. Learning how to use epoxy grout is a great skill to have and can be used for any type of mosaic art project or installation.
You can also enjoy two bonus sections that introduce you to more options for creating your unique address sign.
This course comes with a full downloadable PDF with all the tools materials and resources to get started.
Your Instructor
Tami Macala
Tami has been a mosaic artist for over 20 years. Tami has created high end custom large scale commissions since 2000 and has her work installed all over the world.
Tami began teaching mosaic art in 2009, when she founded Santa Barbara School of Mosaic Art. Tami loves to share her years of experience and mosaic knowledge with enthusiastic and creative students.
In 2016 Tami launched Mosaic Arts Online, allowing mosaic art enthusiasts from all over the world to learn how to create mosaic art. She loves that more people now can learn from her without having to leave the comfort of their studio. In each course Tami teaches, she wants her students to feel they have more confidence when creating their own style of mosaic art.
Most importantly just have fun~
Course Curriculum
First Section
Start
Introduction to How to Create a Mosaic Address Sign. (1:57)
Start
Downloadable PDF Tools, Materials, and Resources.
Start
Choosing a substrate. (3:54)
Start
Choosing the tesserae (materials). (4:08)
Start
Design and template choices. (4:43)
Start
Cutting the materials. (6:30)
Start
Cutting Mexican Smalti. (4:15)
Start
Adhesives. (3:32)
Start
Install the Hanging Hardware. (3:13)
Start
How to Mix Mortar (thinset). (3:26)
Start
Introducing the Mexican Smalti design elements. (5:31)
Start
Adhering the Mexican Smalti. (11:19)
Start
Moving along on the “2”. (6:07)
Start
Working on finishing the “2”. (9:15)
Start
Starting on the “1”. (9:20)
Start
Continuing on the “1”. (6:51)
Start
Finishing off the first “1”. (8:37)
Start
Starting the second “1”. (10:28)
Start
Evaluating your work while creating. (6:13)
Start
Cleaning tips and continuing the second “1”. (7:35)
Start
Finishing the second “1”. (7:44)
Start
Prepping for the background. (3:18)
Start
Introducing the background pattern. (3:52)
Start
How to make a piping bag for the mortar (thinset). (8:36)
Start
Going over the details. (10:41)
Start
Continuing around the “2”. (10:06)
Start
Working around the first “1”. (11:32)
Start
Finishing up the background. (10:55)
Start
Cleaning before grouting. (6:08)
Start
How to tape off the background. (5:55)
Start
How to mix epoxy grout. (8:51)
Start
Grout cleaning on the numbers. (10:29)
Start
The Popped look of the numbers. (1:27)
Start
How to tape off the numbers. (2:19)
Start
Mixing epoxy grout for the background. (3:26)
Start
Applying the grout for the background. (4:42)
Start
Cleaning the grout for the background. (2:01)
Start
Removing the tape off the numbers. (4:18)
Start
Wrap Up. (1:30)
Start
BONUS! Part 1. (3:49)
Start
BONUS! Part 2. (6:13)


Reviews
There are no reviews yet.