

![[Audio Only] IC94 Keynote 03 - OUT OF MY MIND AND YOURS - Bernie Siegel](https://intellschool.info/wp-content/uploads/2022/02/MrI_A_JRMkeje763RUZqjg-200.jpg)

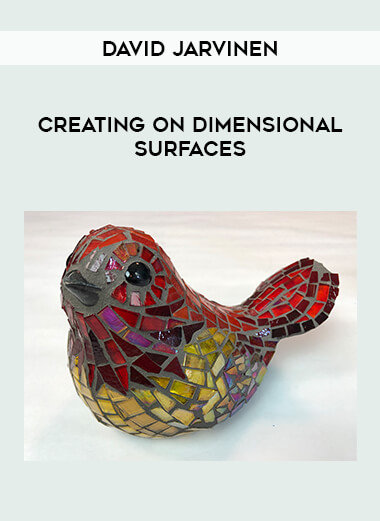
David Jarvinen – Creating on Dimensional Surfaces
 Salepage : David Jarvinen – Creating on Dimensional Surfaces
Arichive : David Jarvinen – Creating on Dimensional Surfaces
Are you ready to dive into some creative fun while working on a 3D object? David Jarvinen has created his latest course aimed at teaching beginners and intermediates.
Taking any type of sculptural object such as garden art or bisqueware, you will learn how to create a whimsical mosaic art piece using a variety of materials.
David starts by introducing different substrates to choose from and shares his secrets on how to successfully prepare them. Once you have your substrate ready, David will demonstrate how to draw the design lines and designate which way the tesserae (materials) will lay out. You will learn all of David’s tips and tricks for using the Weldbond adhesive to create better tackiness while working on the 3D object, and he will also cover other adhesives that can be used in exterior or interior elements.
David will mosaic the entire “Happy Bird” in this course, complete with a demonstration of how to grout the sculpture to create a vibrant and colorful art piece for your home or yard. You can apply all of these techniques to any kind of sculpture.
This course comes with a fully downloadable PDF with all the tools, materials, and resources, including vendors to choose different animals and sculptures to mosaic on.
Your Instructor
David Jarvinen
I came to the mosaic industry through ceramic tile contracting and a couple of clay artists. Our business was remodeling kitchens and baths with ceramic and glass tile, and doing tile jobs most other contractors wouldn’t. This led to a reputation for being creative.
During this time, I met those couple of clay artists that asked me to assist with their school and public mural installations they had created. It was great fun and I volunteered to help. Then, after a year or two of volunteering, I landed a paying gig to cover for one of the artist installers, as they needed to go out of town. That was the beginning. Circa 1998.
From this beginning, I worked to incorporate mosaics into my contracting business and there was a market! It wasn’t huge, but it was there—I worked to make mosaics mainstream through our business and have had some happy customers as a result.
Most of my work was architectural in nature. Then the clay artist who had instructed classes, for which I assisted—was moving out of state, so I approached the host venues and inquired to see if I could take over for her. They were happy to give me a try. That was the beginning of my instruction career. Circa 2004.
I continued to expand my collaborations and as of 2017 I am continuing to instruct, learn and create mosaics!
Course Curriculum
First Section
Start
Introduction and personal interview with David and Tami. (5:12)
Start
Downloadable PDF Tools, Materials, and Resources.
Start
Introduction to the 3D substrates. (1:24)
Start
Prepping the substrates. (4:47)
Start
Proper adhesives for the 3D substrates. (1:27)
Start
How to create the design. (4:05)
Start
Introduction to the materials. (2:46)
Start
Cutting the materials. (5:01)
Start
Starting to mosaic the substrate. (8:58)
Start
Giving the bird dimension. (7:50)
Start
How to mosaic the wings. (8:58)
Start
Continuing the mosaic process. (8:21)
Start
Working on the tail and the breast. (5:58)
Start
Introduction to the grouting process. (3:06)
Start
Applying the grout. (2:57)
Start
Dry buffing the grout. (3:34)
Start
Finish grouting and Wrap Up! (2:30)


Reviews
There are no reviews yet.